Native Authentication
Native authentication is for developers who want to completely customize the login experience through Nylas to match their application.
When to Use Native Authentication
- You want to completely customize the entire authentication process.
- You don’t mind handling credentials and error handling.
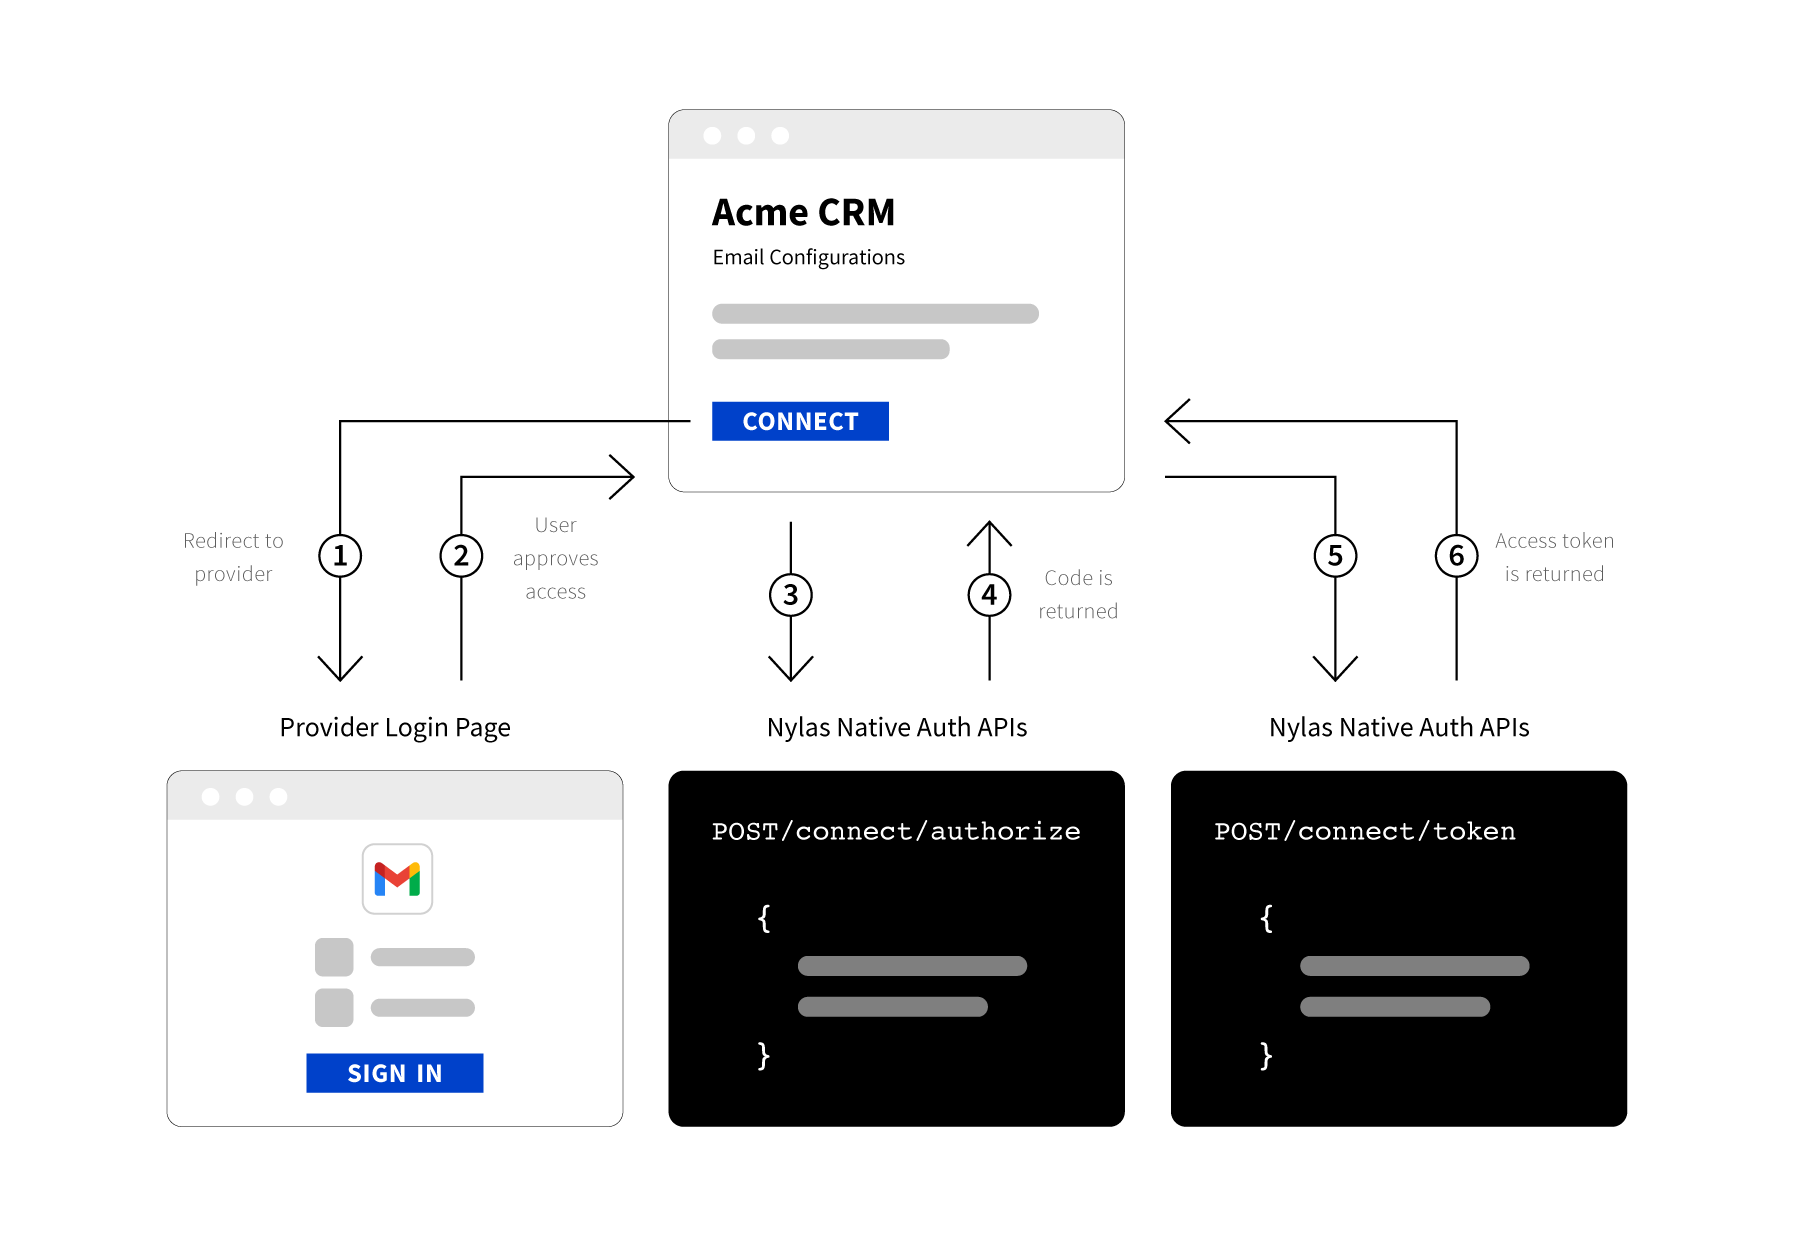
There are 3 steps to get an access_token for an account using Native Authentication:
- Create a branded login page and have the user enter the information.
- Send a request to /connect/authorize with the required credentials and scopes.
- Nylas returns a one-time use code. Send the code to /connect/token to get the access token.
Step 1 Create a Branded Page
If you are using Native Authentication, instead of Hosted Authentication, you need to create a branded login page. The branded page is where your users will enter the login credentials.
We don’t recommend storing this information, instead, you should immediately make a request to /connect/authorize with the user-provided credentials.
Step 2 Make a Request to Connect Authorize
Use the credentials from your branded login page and make a request to Nylas with the correct provider settings and scopes.
The request parameters are:
- Client ID - The
client_idfrom your Nylas application. Create a Nylas app if you need aclient_id. - Name - Name of the User
- Email Address - User email address
- Provider - Name of the email provider.
- Settings - The settings object will vary depending on the provider. It typically includes information such as the username, password, SMTP, client_id, and client_secret. Check the provider settings to learn which information you need to provide.
- Scopes - Review Authentication Scopes to learn more.
- If scopes are not specified, we will add default scopes.
Example /connect/authorize Request
curl -X POST https://api.nylas.com/connect/authorize -d '{
    "client_id": "nylas_client_id",
    "name": "Nyla the Cheetah",
    "email_address": "[email protected]",
    "provider": "aol",
    "settings": {
        "password": "MakeEmailSuckLess"
    },
    "scopes": "email.read_only,calendar.read_only,contacts.read_only"
}'
In the response, Nylas will return a one-time use code that you can exchange for an access_token. This code is only valid for 15 minutes. After that time, the code will expire.
Learn More
A full list of parameters can be found at /connect/authorize.
Step 3 Exchange the Code
Now that you have your one-time use code, send a request to /connect/token to get an access token.
Example /connect/token Request
curl -X POST "https://api.nylas.com/connect/token" -d '{
  "client_id": "{client-id}",
  "client_secret": "{client-secret}",
  "code": "{nylas_code}"
}'
In response, Nylas will return the account information.
Learn More
A full list of parameters can be found at /connect/authorize
Keep in Mind Native Authentication
- Your app will need to provide:
- Error handling
- Provider and server settings detection
- Handle credentials securely
- Determine the scopes you need. If you need to change scopes, the user will have to reauthenticate.
Native Authentication Demo Apps
Take a look at our Native Authentication examples on GitHub.
What's Next
Certain providers have extra requirements. Review the documentation for each.