Upgrade Azure app to use Microsoft Graph
This page explains how to upgrade your existing Azure application to use Microsoft Graph scopes.
Add Microsoft Graph scopes
First, determine which Microsoft Graph scopes you need for your project and add them to your Azure app:
- From the Azure Portal home page, select Microsoft Entra ID in the left navigation.
- Click App registrations and select the application that you want to configure.
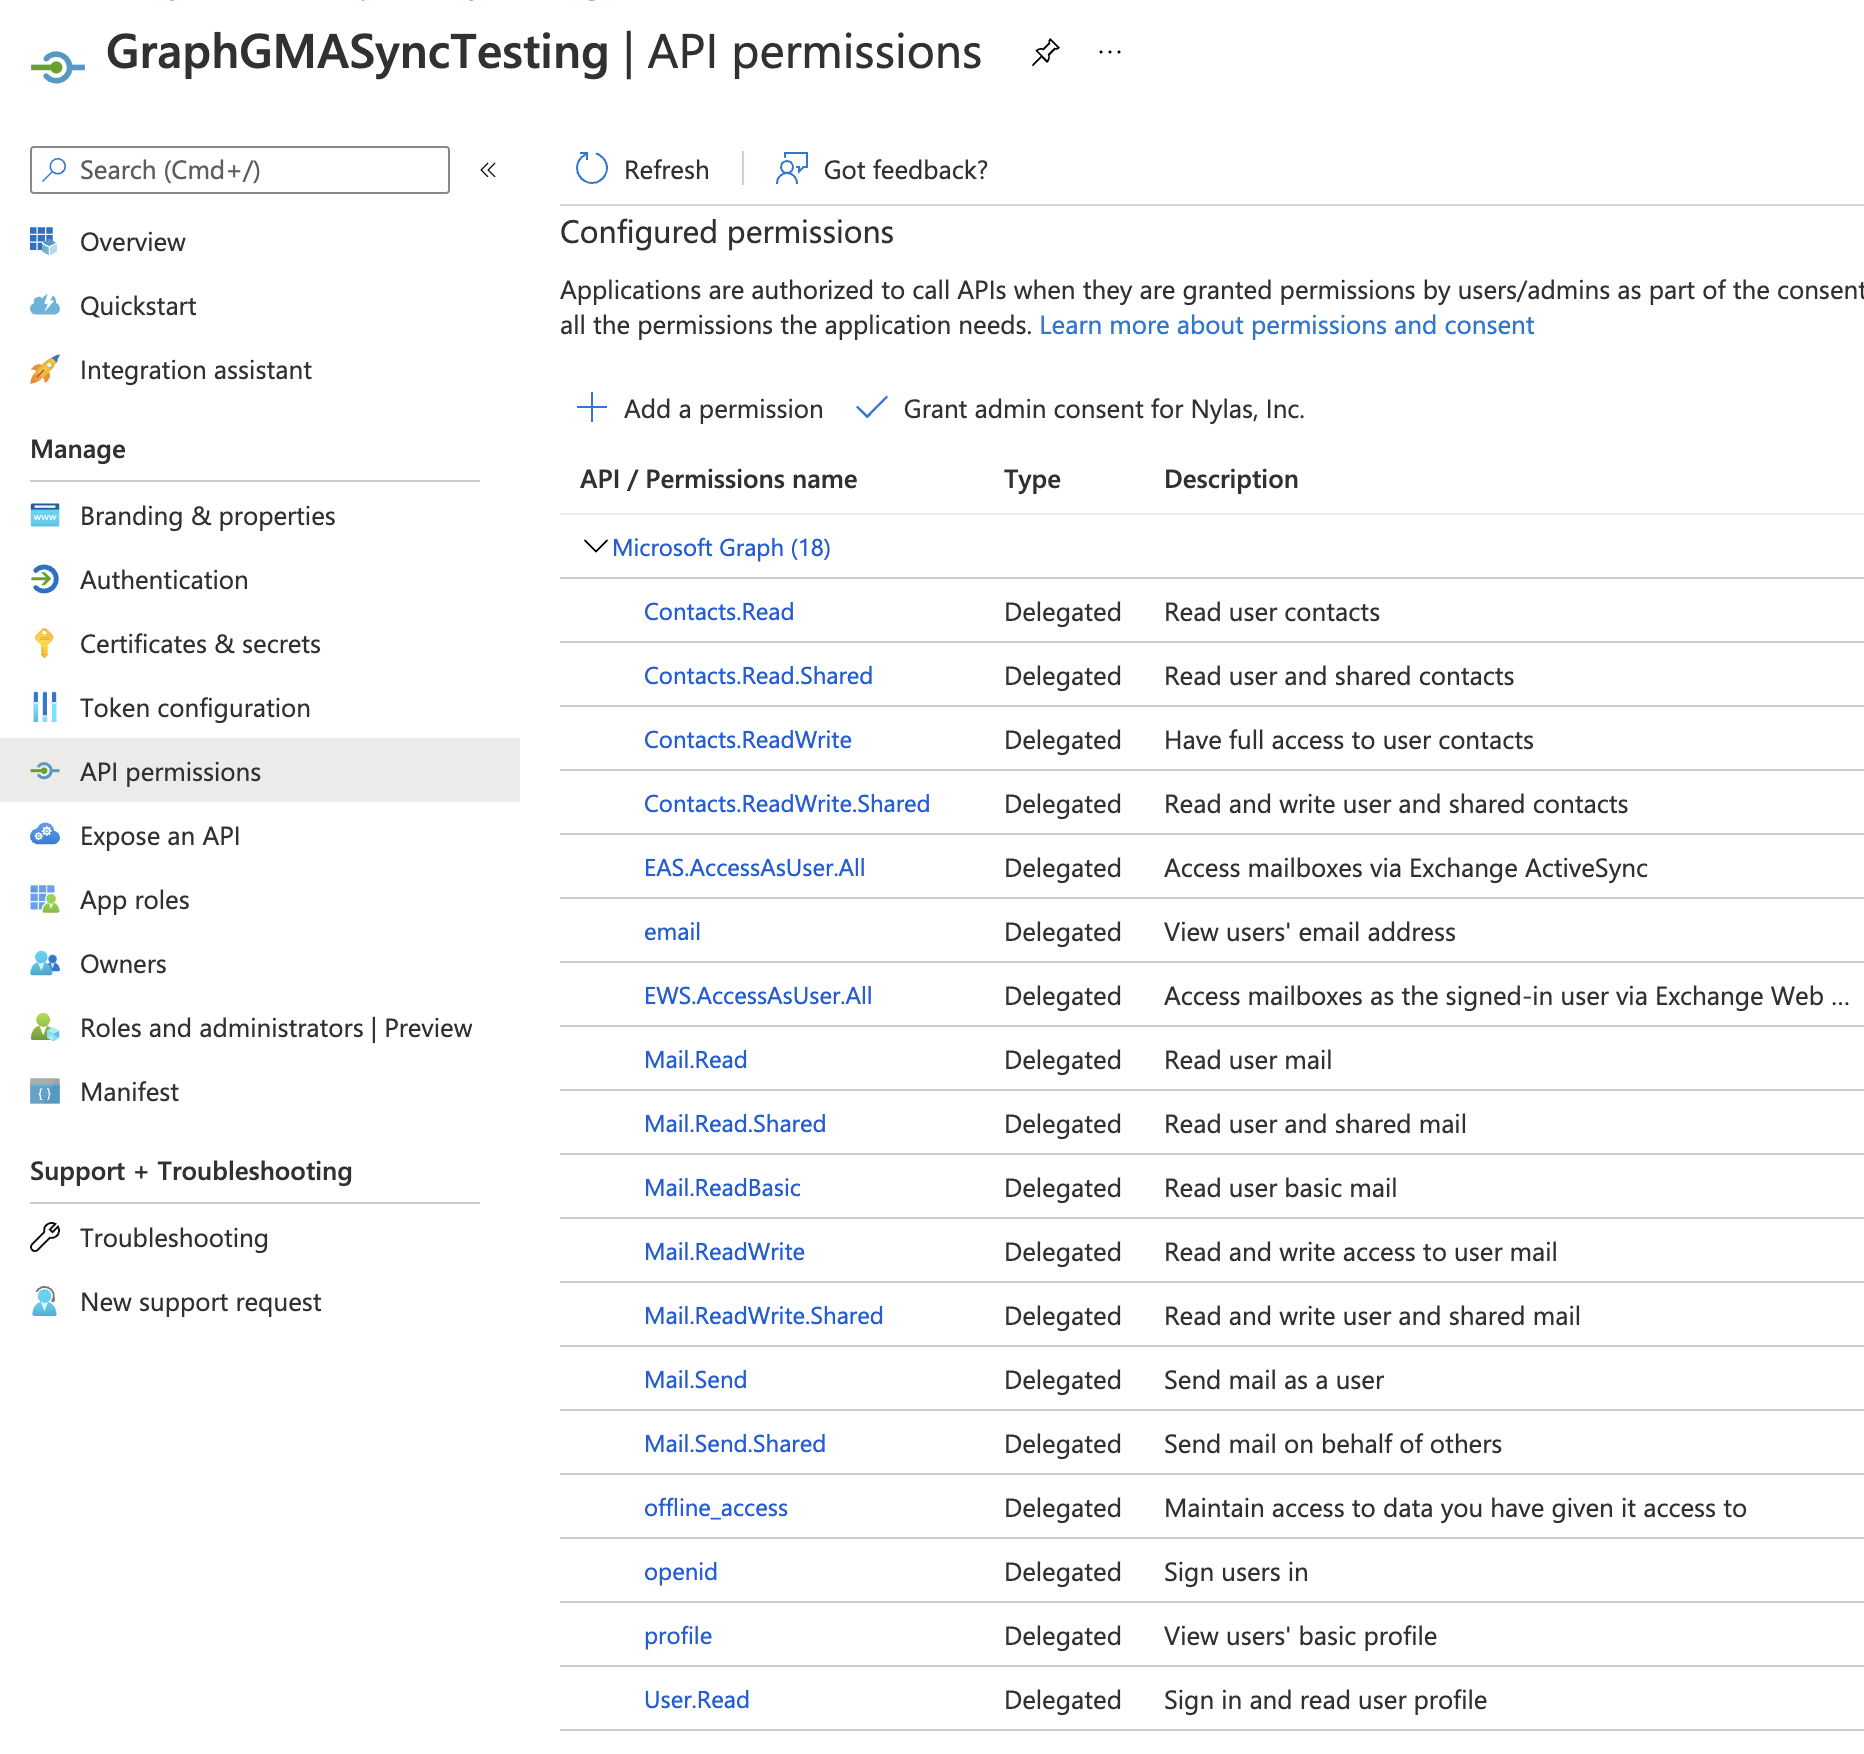
- Click Manage > API permissions.

- Click Add a permission and choose Microsoft Graph > Delegated permissions.
- Add the following permissions based on the Nylas features your project uses:
- Read email messages:
Mail.Read - Read and modify email messages:
Mail.ReadWrite - Send email messages:
Mail.ReadWrite,Mail.Send - Read and modify calendars:
Calendar.ReadWrite - Read contacts:
Contacts.Read - Read and modify contacts:
Contacts.ReadWrite
- Read email messages:
- (Optional) If you're using integrations (for example, Microsoft Teams), click Add a permission > Microsoft Graph > Delegated permissions and use the search bar to find and add
OnlineMeetings.ReadWrite.
⚠️ Confirm that you've requested all the correct scopes for your project before you continue. These scopes are what switch your Azure app to using Microsoft Graph.
Add Nylas v3 redirect URIs to your Azure application
Next, add the Nylas v3 redirect URIs to your Azure app:
- From the Azure Portal home page, select Microsoft Entra ID in the left navigation.
- Click App registrations and select the application that you want to configure.
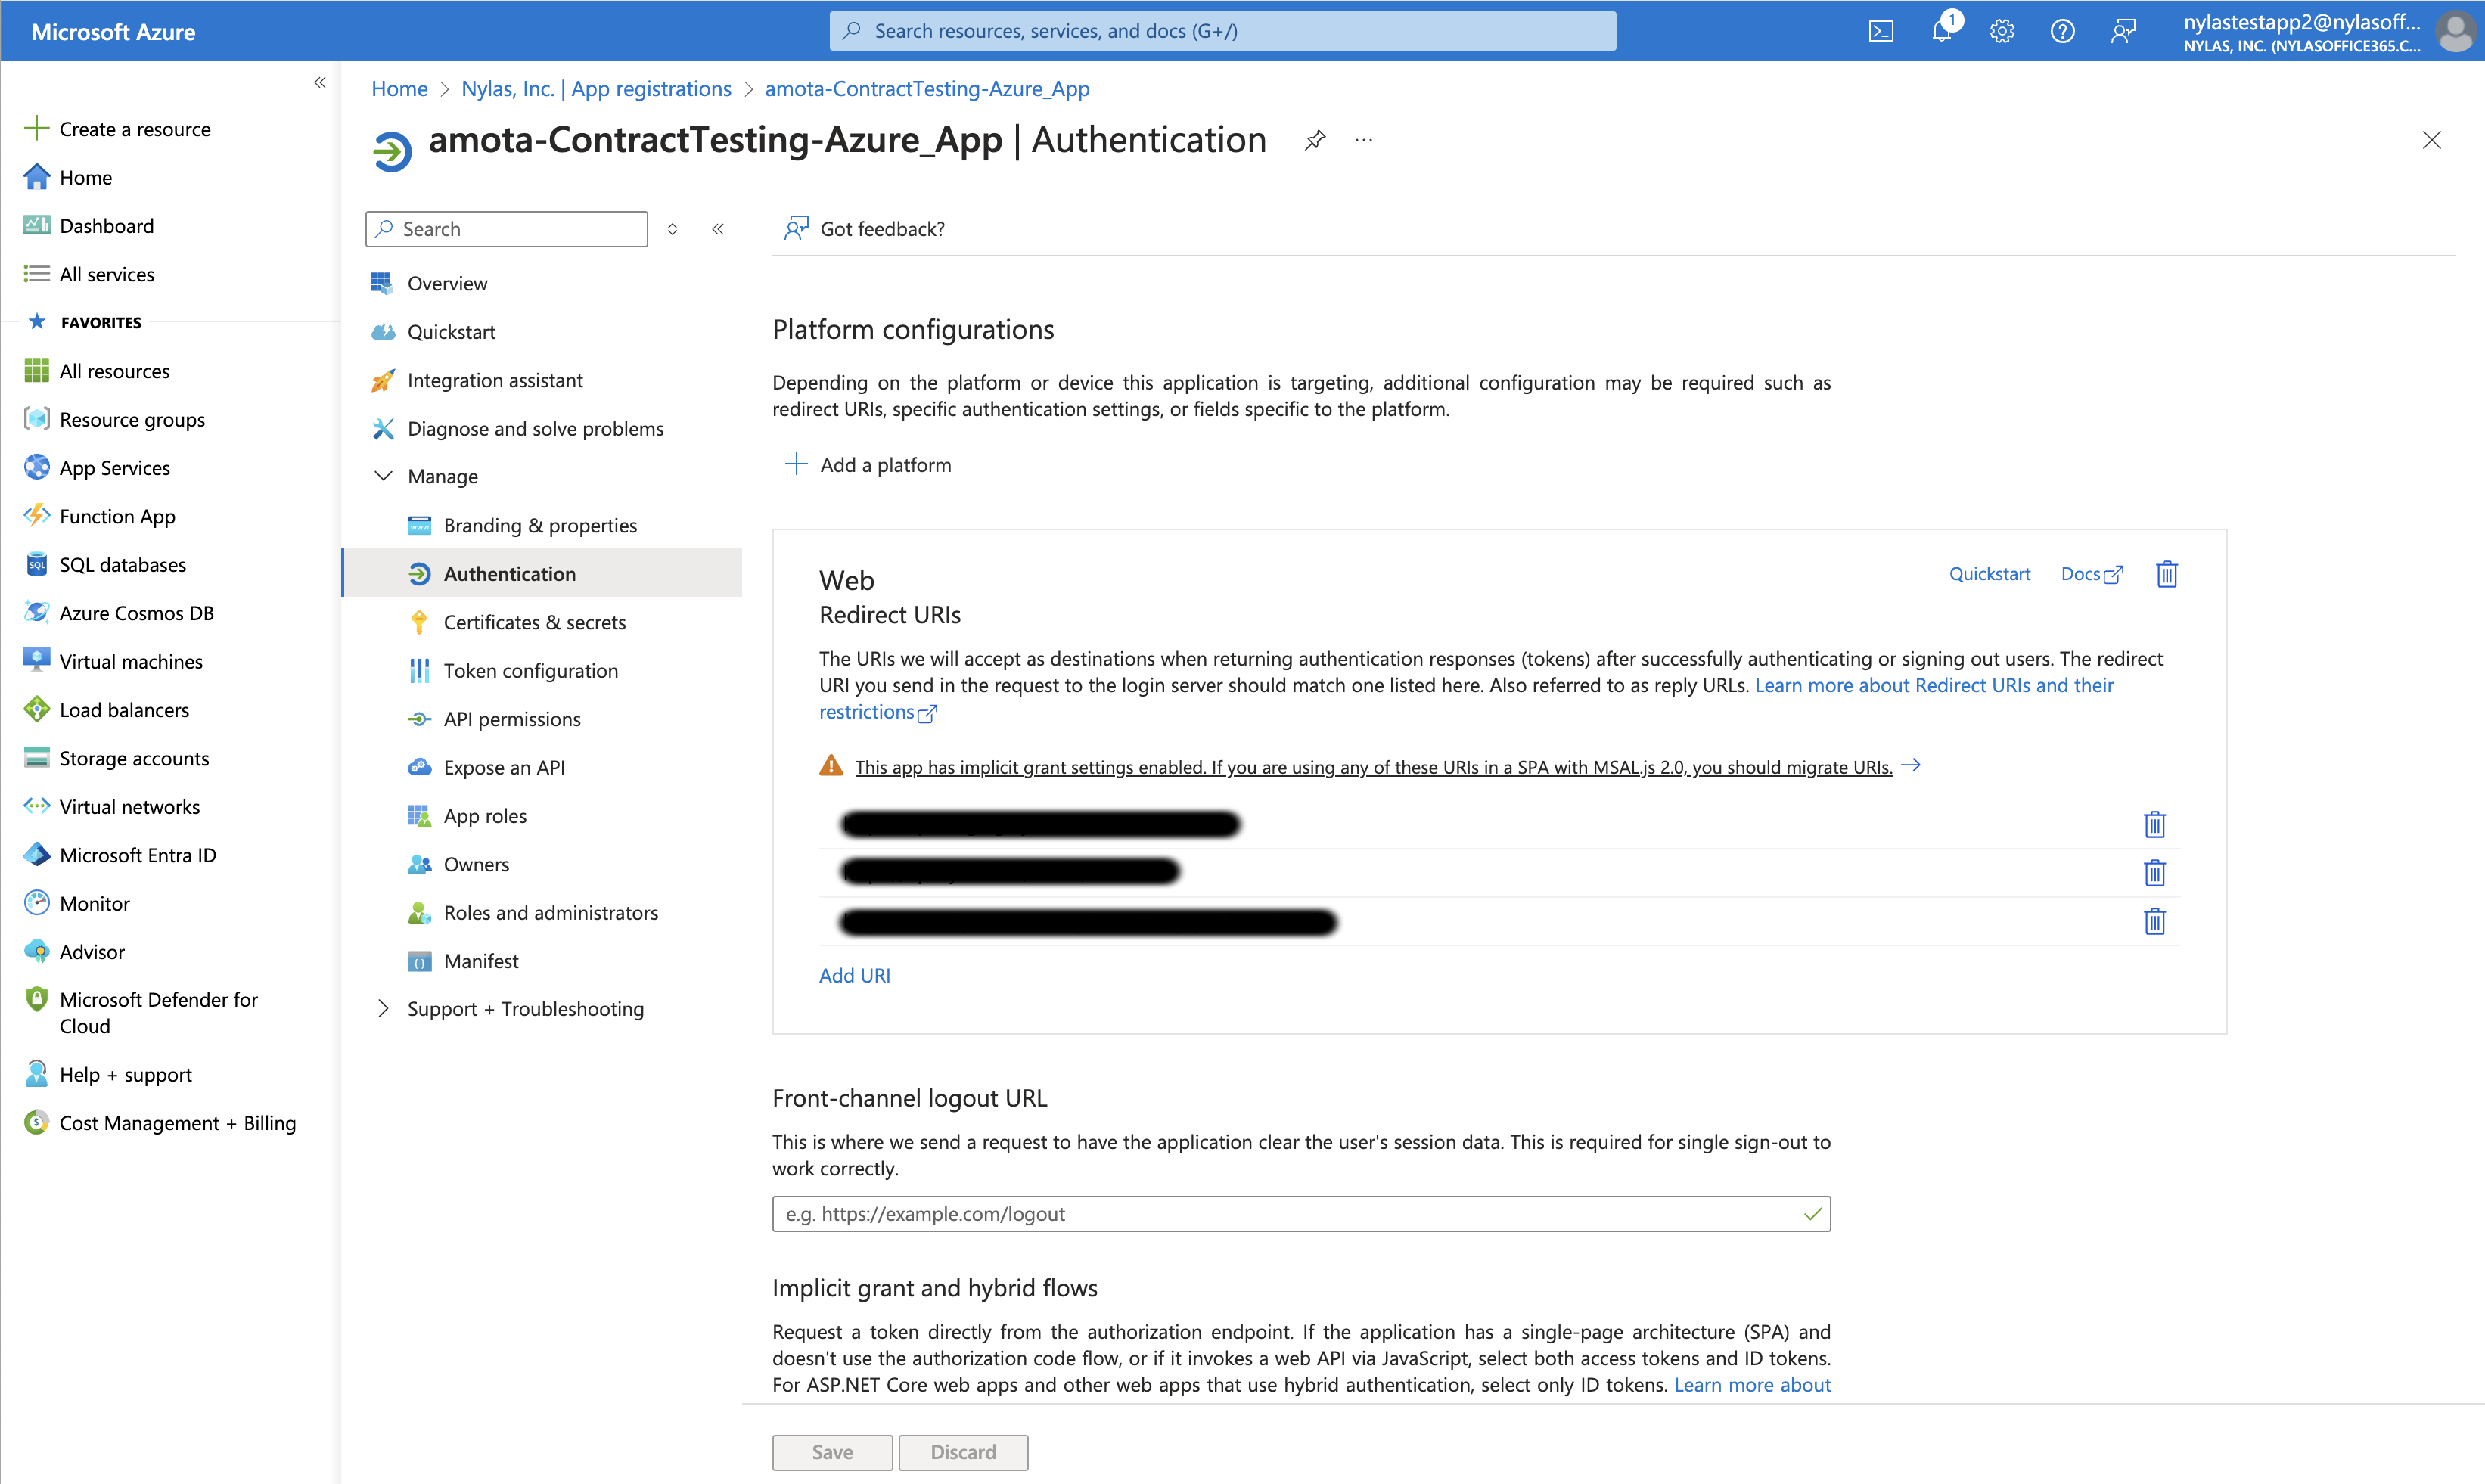
- Click Manage > Authentication.

- Click Add URI and enter the Nylas v3 redirect URI that corresponds with your application's region:
- U.S.:
https://api.us.nylas.com/v3/connect/callback - E.U.:
https://api.eu.nylas.com/v3/connect/callback
- U.S.:
- Under Implicit grant and hybrid flows, enable Access tokens and ID tokens.
- Under Supported account types, choose the option that's appropriate for your application:
- If you need to limit authentication to accounts in your organization only, choose Accounts in this organizational directory only. You'll need your tenant ID for this option, and you must MDM-verify your app before you can publish it.
- If you don't need to limit authentication to your organization, choose Accounts in any organizational directory.
- Save your changes.
Get Azure client secret and value
🚀 If you already have your Azure client secret and value, you can skip this step.
Finally, create a client secret for your Azure app and get its value:
Get your Azure client secret and value
💡 If you already have your Azure client secret and value, you can skip this step.
Finally, get your Azure client secret and value:
- From the Azure Portal home page, select Microsoft Entra ID in the left navigation.
- Click App registrations and select the application that you want to configure.
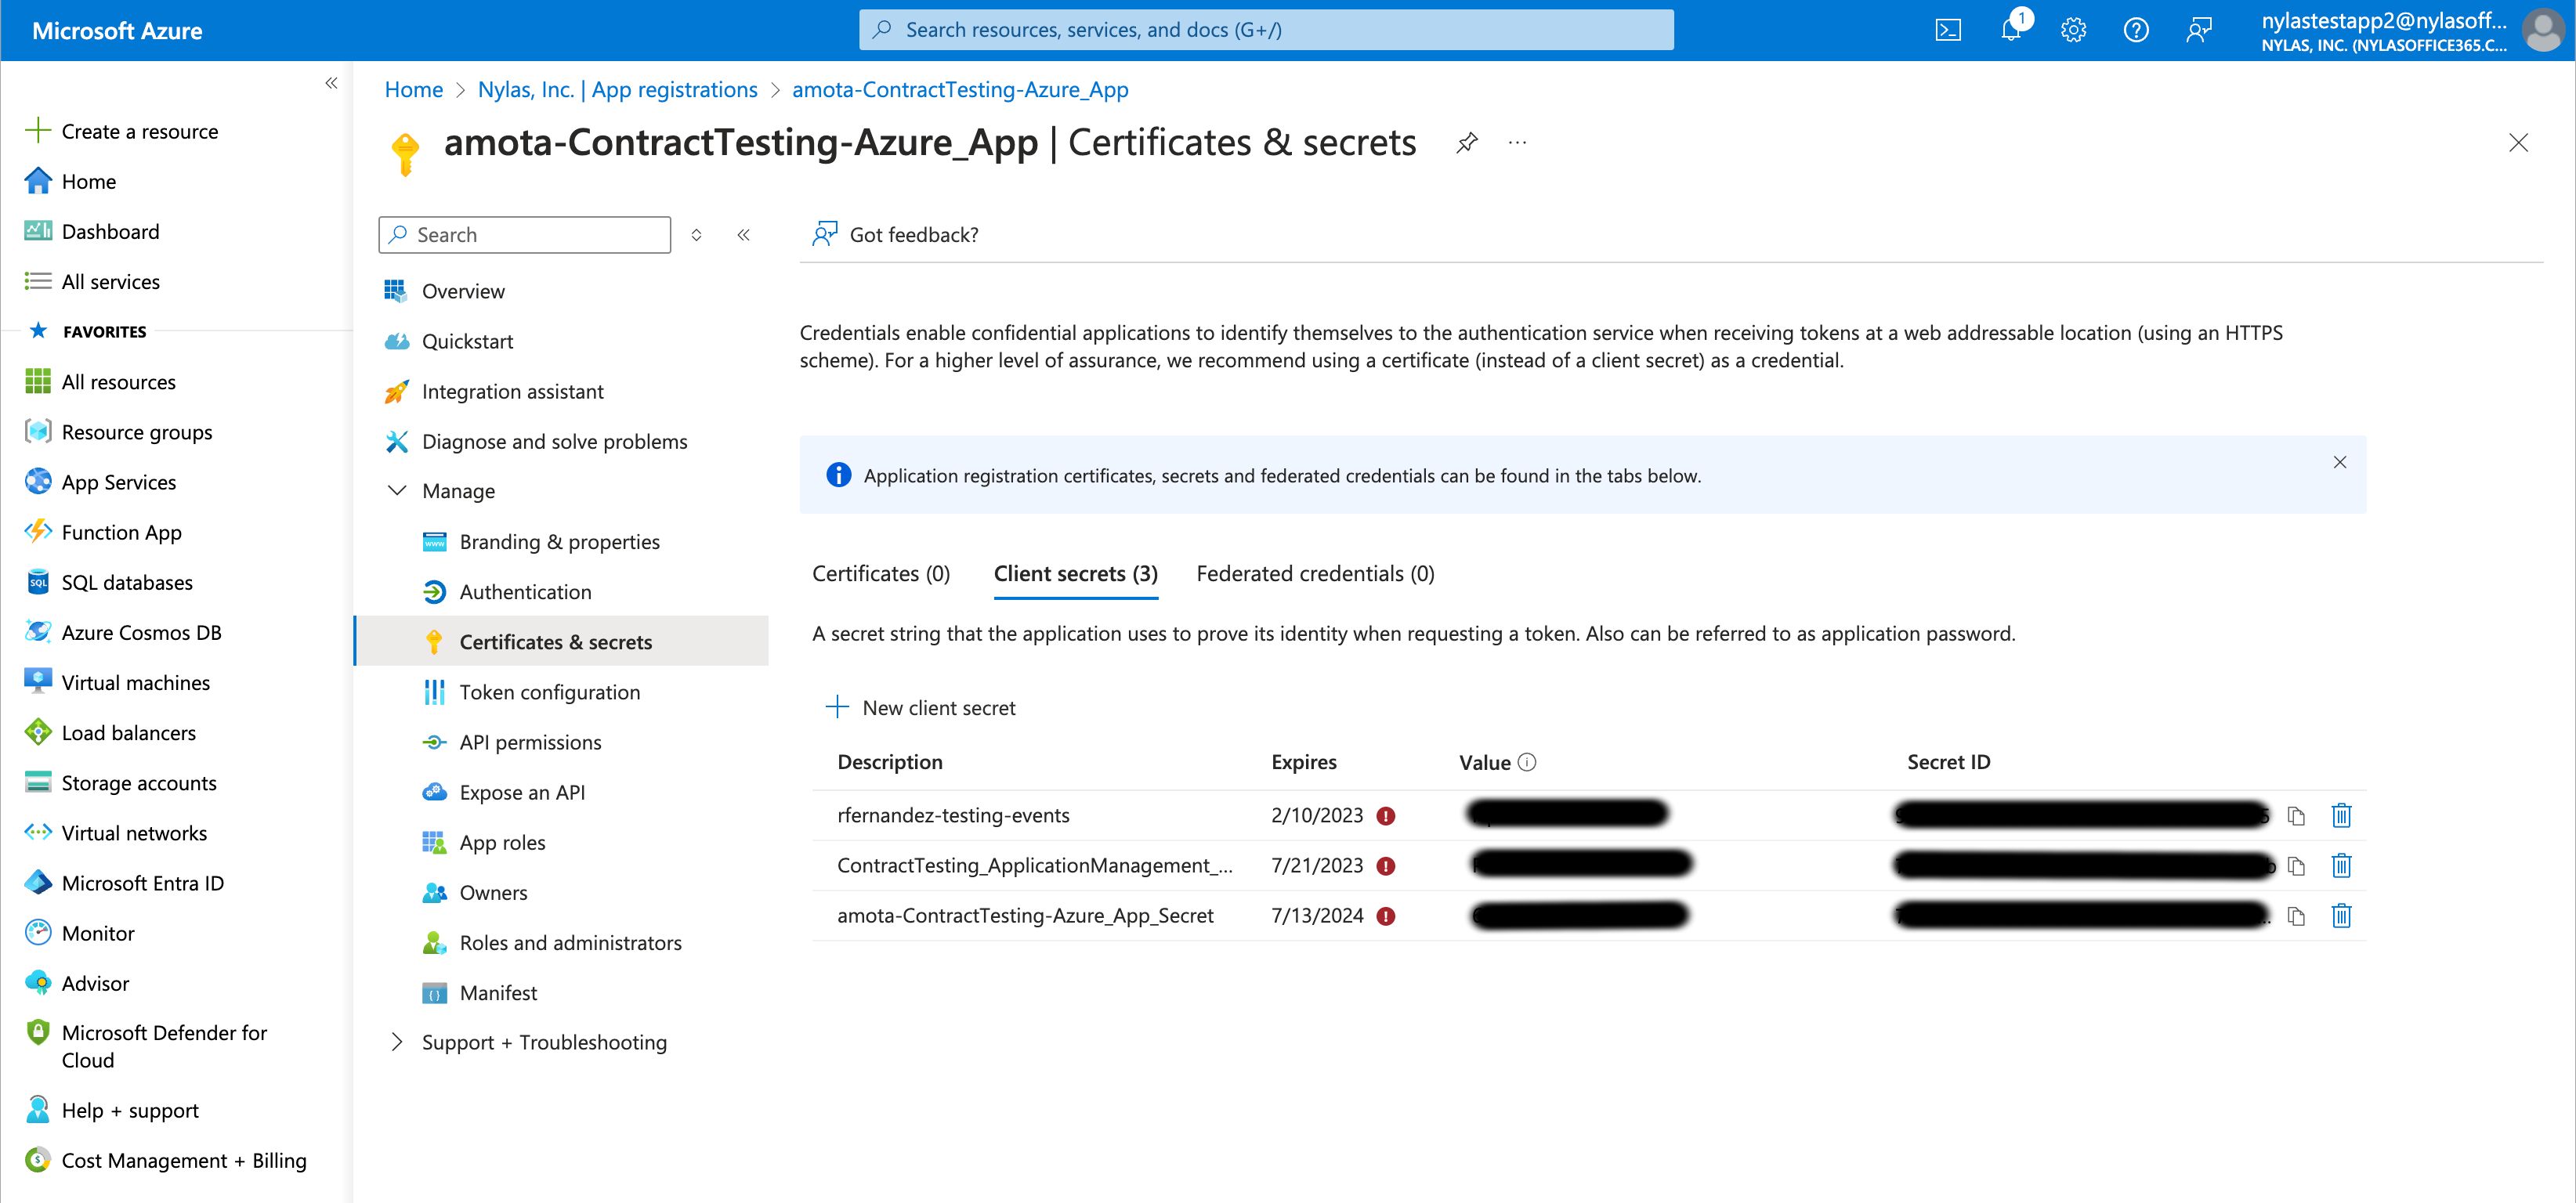
- Click Manage > Certificates & secrets.

- Click New client secret.
- Enter a brief description of the secret and set the duration that you want it to be valid.
- Copy the value and keep it somewhere safe, like a secrets manager.
⚠️ Be sure to save the client secret value somewhere secure. Azure shows the value only once, and if you navigate away from this page you cannot retrieve the key value. For best practices, see Storing secrets securely.
Re-authenticate end users
After you upgrade your Azure app to use Microsoft Graph scopes, your end users must re-authenticate to add the scopes to their accounts. You can either force them to re-authenticate, or communicate the changes to them and ask them to re-authenticate.