Getting started with Nylas Scheduler
In this tutorial, you'll learn how to install the Scheduler UI Components and set up Nylas Scheduler.
Before you begin
Before you start using the Scheduler UI Components, complete the following tasks:
- Sign up for a Nylas account.
- Sign in to the v3 Dashboard and create a Nylas application.
- Generate an API key for your application and save it.
- Authenticate an end user grant.
Install Scheduler UI Components
There are two ways to add Scheduler: using Web components (HTML/Vanilla JS) or React.
- To use the Scheduler UI Component as Web components, include the CDN package links in your project. You should use a specific version to ensure stability.
- To install the Scheduler UI Components as React components, install the npm package. The npm package includes both the Scheduling Component and the Scheduler Editor Component.
You can use the @latest tag to pull the latest version for demo purposes and quick testing. However, you should pin to a specific version when developing for production so you can control behavior and consistency. The links below include the Scheduler UI components at a specific version, rather than using the latest version.
<!--Scheduling Component-->
https://cdn.jsdelivr.net/npm/@nylas/web-elements@1.1.4/dist/cdn/nylas-scheduling/nylas-scheduling.es.js

<!--Scheduler Editor Component-->
https://cdn.jsdelivr.net/npm/@nylas/web-elements@1.1.4/dist/cdn/nylas-scheduler-editor/nylas-scheduler-editor.es.js
npm install @nylas/react@latest Use Scheduler UI Components in your project
The following examples show how you can include the Scheduling Component in your project.
<html>
  <body>
    <nylas-scheduling></nylas-scheduling>

    <script type="module">

      import { defineCustomElement } from "https://cdn.jsdelivr.net/npm/@nylas/web-elements@latest/dist/cdn/nylas-scheduling/nylas-scheduling.es.js";

      defineCustomElement();

      const nylasScheduling = document.querySelector('nylas-scheduling');

      // Set the scheduler configuration ID if using public configuration (`requires_session_auth=false`)
      nylasScheduling.configurationId = '<SCHEDULER_CONFIG_ID>';

      // OR, Set the scheduler session ID if using private configuration (`requires_session_auth=true`)
      // nylasScheduling.sessionId = '<SCHEDULER_SESSION_ID>';
    </script>
  </body>
</html>
import React from 'react';
import { NylasScheduling } from '@nylas/react';
function App() {
// Set the scheduler configuration ID if using public configuration (`requires_session_auth=false`)
const configId = '<SCHEDULER_CONFIG_ID>';
return <NylasScheduling configurationId={configId} />;
// OR, Set the scheduler session ID if using private configuration (`requires_session_auth=true`)
// const sessionId = '<SCHEDULER_SESSION_ID>';
// return <NylasScheduling sessionId={sessionId} />;
}
export default App; For more information, see the Scheduler UI Components reference documentation.
Create a configuration
Next, create a configuration for your first event. A configuration defines your preferred event settings and preferences. Nylas Scheduler stores Configuration objects in the Scheduler database, and loads them as Scheduling Pages in the Scheduler UI.
You can create a configuration either using the Scheduler API or using the Scheduler Editor.
Create a configuration using the Scheduler API
You can make a POST /v3/grants/<NYLAS_GRANT_ID>/scheduling/configurations request to create a configuration.
By default, Nylas creates a public configuration that doesn't require a session. See Scheduler configurations for more information.
The response includes the ID of the Configuration object.
curl --request POST \
  --url "https://api.us.nylas.com/v3/grants/<NYLAS_GRANT_ID>/scheduling/configurations" \
  --header 'Accept: application/json, application/gzip' \
  --header 'Authorization: Bearer <NYLAS_API_KEY>' \
  --header 'Content-Type: application/json' \
  --data '{
    "requires_session_auth": false,
    "participants": [
      {
        "name": "Test",
        "email": "nylas_test_8",
        "is_organizer": true,
        "availability": {
          "calendar_ids": [
            "primary"
          ]
        },
        "booking": {
          "calendar_id": "primary"
        }
      }
    ],
    "availability": {
      "duration_minutes": 30
    },
    "event_booking": {
      "title": "My test event"
    }
  }'
{
"ID": "AAAA-BBBB-1111-2222",
"participants": [
{
"name": "Nylas",
"email": "nylas@example.com",
"is_organizer": true,
"availability": {
"calendar_ids": [
"primary"
]},
"booking": {
"calendar_id": "primary"
}}],
"availability": {
"duration_minutes": 30
},
"event_booking": {
"title": "My test event"
}
} Create a configuration using the Scheduler Editor
When you create a Scheduling Page using the Scheduler Editor in the UI, Nylas creates a corresponding configuration.
⚠️ You must have a working front-end UI to use the Scheduler Editor to create a configuration. Follow the Scheduler Quickstart guide to get a local development environment up and running.
To create a configuration using the Scheduler Editor, follow these steps:
-
To use the Scheduler UI Components, include the Scheduler Editor and Scheduling scripts in your app.
- Set
nylasSessionsConfig. The Scheduler Editor Component uses the Hosted authentication details innylasSessionsConfigto interact with the Nylas APIs. For more information on the required properties and other authentication options, see Set up the Scheduler Editor Component. - By default, Nylas creates a public configuration that doesn't require a session (
requires_session_auth: false). For more information, see Scheduler configurations.
The following examples add the Nylas Scheduler Editor and Scheduling scripts, and create a public configuration. The React example includes both Scheduler Editor and the Scheduling Page scripts in one file.
- Set
<!-- scheduler-editor.html -->

<!DOCTYPE html>
<html class="h-full bg-white" lang="en">
<head>
  <meta charset="UTF-8" />
  <meta name="viewport" content="width=device-width, initial-scale=1.0" />
  <title>Nylas Scheduler Editor Component</title>

  <link rel="preconnect" href="https://fonts.googleapis.com" />
  <link rel="preconnect" href="https://fonts.gstatic.com" crossorigin />
  <link
    href="https://fonts.googleapis.com/css2?family=Inter:wght@100..900&display=swap"
    rel="stylesheet"
  />

  <script src="https://cdn.tailwindcss.com"></script>

  <style type="text/css">
    body {
      font-family: "Inter", sans-serif;
    }
  </style>
</head>

<body class="h-full">
  <div class="grid h-full place-items-center">
    <!-- Add the Nylas Scheduler Editor component -->
    <nylas-scheduler-editor />
  </div>

  <!-- Configure the Nylas Scheduler Editor component -->
  <script type="module">

    import { defineCustomElement } from "https://cdn.jsdelivr.net/npm/@nylas/web-elements@latest/dist/cdn/nylas-scheduler-editor/nylas-scheduler-editor.es.js";

    defineCustomElement();

    const schedulerEditor = document.querySelector("nylas-scheduler-editor");
    schedulerEditor.schedulerPreviewLink = `${window.location.origin}/?config_id={config.id}`;
    schedulerEditor.nylasSessionsConfig = {
      clientId: "NYLAS_CLIENT_ID", // Replace with your Nylas client ID from the previous section
      redirectUri: `${window.location.origin}/scheduler-editor`,
      domain: "https://api.us.nylas.com/v3", // or 'https://api.eu.nylas.com/v3' for EU data center
      hosted: true,
      accessType: "offline",
    };
    schedulerEditor.defaultSchedulerConfigState = {
      selectedConfiguration: {
        requires_session_auth: false, // Creates a public configuration which doesn't require a session
        scheduler: { // The callback URLs to be set in email notifications
          rescheduling_url: `${window.location.origin}/reschedule/:booking_ref`, // The URL of the email notification includes the booking reference
          cancellation_url: `${window.location.origin}/cancel/:booking_ref`
        }
      }
    };
  </script>
</body>
</html>
<!-- index.html -->
<!DOCTYPE html>
<html class="h-full bg-white" lang="en">
<head>
<meta charset="UTF-8" />
<meta name="viewport" content="width=device-width, initial-scale=1.0" />
<title>Nylas Scheduling Component</title>
<link rel="preconnect" href="https://fonts.googleapis.com" />
<link rel="preconnect" href="https://fonts.gstatic.com" crossorigin />
<link
href="https://fonts.googleapis.com/css2?family=Inter:wght@100..900&display=swap"
rel="stylesheet"
/>
<script src="https://cdn.tailwindcss.com"></script>
<style type="text/css">
body {
font-family: "Inter", sans-serif;
}
</style>
</head>
<body>
<div class="grid gap-0 h-full place-items-center">
<div class="grid gap-4">
<!-- A button to view the Scheduler Editor -->
<a
href="scheduler-editor.html"
class="w-fit border border-blue-500 hover:bg-blue-100 text-blue-500 font-bold py-2 px-4 rounded"
>
View Scheduler Editor
</a>
<!-- Add the Nylas Scheduling Component -->
<nylas-scheduling></nylas-scheduling>
</div>
</div>
<!-- Configure the Nylas Scheduling Component with a scheduler configuration ID -->
<script type="module">
import { defineCustomElement } from "https://cdn.jsdelivr.net/npm/@nylas/web-elements@latest/dist/cdn/nylas-scheduling/nylas-scheduling.es.js";
defineCustomElement();
const nylasScheduling = document.querySelector("nylas-scheduling");
// Set the scheduler api url based on the data center
nylasScheduling.schedulerApiUrl = "https://api.us.nylas.com"; // or 'https://api.eu.nylas.com' for EU data center
// Get the scheduler configuration ID from the URL ?config_id=NYLAS_SCHEDULER_CONFIGURATION_ID
const urlParams = new URLSearchParams(window.location.search);
// If not config_id exists, throw a console.error
if (!urlParams.has("config_id")) {
console.error(
"No scheduler configuration ID found in the URL. Please provide a scheduler configuration ID."
);
}
// Set the scheduler configuration ID
nylasScheduling.configurationId = urlParams.get("config_id");
</script>
</body>
</html> import { BrowserRouter, Route, Routes } from "react-router-dom";
import { NylasSchedulerEditor, NylasScheduling } from "@nylas/react";
import "./App.css";
function App() {
// Get the configuration ID from the URL query string
const urlParams = new URLSearchParams(window.location.search);
const configId = urlParams.get("config_id") || "";
return (
<BrowserRouter>
<Routes>
<Route path="/" element={
<div>
<a href="/scheduler-editor" className="button">View Scheduler Editor</a>
<NylasScheduling
configurationId={configId}
schedulerApiUrl="https://api.us.nylas.com"
/>
</div>
} />
<Route path="/scheduler-editor" element={
<div>
<NylasSchedulerEditor
schedulerPreviewLink={`${window.location.origin}/?config_id={config.id}`}
nylasSessionsConfig={{
clientId: "NYLAS_CLIENT_ID", // Replace with your Nylas client ID from the previous
redirectUri: `${window.location.origin}/scheduler-editor`,
domain: "https://api.us.nylas.com/v3", // or 'https://api.eu.nylas.com/v3' for EU data center
hosted: true,
accessType: 'offline',
}}
defaultSchedulerConfigState={{
selectedConfiguration: {
requires_session_auth: false, // Creates a public configuration which doesn't require a session
scheduler: { // The callback URLs to be set in email notifications
rescheduling_url:`${window.location.origin}/reschedule/:booking_ref`, // The URL of the email notification includes the booking reference
cancellation_url:`${window.location.origin}/cancel/:booking_ref`
}
}
}}
/>
</div>
} />
</Routes>
</BrowserRouter>
);
}
export default App; @import url('https://fonts.googleapis.com/css2?family=Inter:wght@100..900&display=swap');
html {
height: 100%;
}
body {
font-family: 'Inter', sans-serif;
margin: 0;
padding: 0;
box-sizing: border-box;
height: 100%;
} #root {
display: grid;
place-items: center;
height: 100%;
}
#root > div {
display: grid;
gap: 1rem;
}
.button {
width: fit-content;
padding-left: 1rem;
padding-right: 1rem;
padding-top: 0.5rem;
padding-bottom: 0.5rem;
font-weight: 700;
color: rgb(59, 130, 246);
text-decoration: inherit;
border-width: 1px;
border-radius: 0.25rem;
border-color: rgb(59, 130, 246);
border-style: solid;
} -
In the UI, create a Scheduling Page from the Scheduler Editor. Creating a Scheduling Page creates a corresponding configuration.
- The examples in the previous step create a public configuration.
- The Scheduling Page's URL includes the configuration ID.
- You can also make a
GET /v3/grants/<NYLAS_GRANT_ID>/scheduling/configurationsrequest to retrieve the configuration ID.
(Optional) Create a session
💡 If you created a public configuration in the previous step, you can skip to the next step.
Next, create a session by making a POST /v3/scheduling/sessions request. When you create a session, you must include the Configuration object ID that you generated in the previous step. Nylas recommends you set a Time-to-Live (TTL) value for each session, and refresh the sessions as they expire.
The response includes the ID of the session.
curl --request POST \
  --url "https://api.us.nylas.com/v3/scheduling/sessions" \
  --header 'Accept: application/json, application/gzip' \
  --header 'Authorization: Bearer <NYLAS_API_KEY>' \
  --header 'Content-Type: application/json' \
  --data '{
    "configuration_id": "AAAA-BBBB-1111-2222",
    "time_to_live": 10
  }'
{
"request_id": "5fa64c92-e840-4357-86b9-2aa364d35b88",
"data": {
"session_id": "XXXX-YYYY-1111-2222"
}
} Set up the Scheduler UI Components
💡 If you created a configuration using the Scheduler Editor, you can skip to the next step.
Set up the Scheduler Editor Component
To modify the configuration in the UI, you can set up the Scheduler Editor component.
Set the nylasSessionsConfig property. The Scheduler Editor Component uses the Hosted authentication details in nylasSessionsConfig to interact with the Nylas APIs.
| Property | Description |
|---|---|
clientId |
The client ID from the Nylas Dashboard. |
redirectUri |
The URL that the OAuth provider sends end users back to after they authenticate. |
domain |
The Nylas authentication domain. For the U.S. data center, use https://api.us.nylas.com/v3. For the E.U. data center, use https://api.eu.nylas.com/v3. |
hosted |
Whether to redirect end users to the hosted login component. |
accessType |
Whether Nylas should return a refresh token along with the exchange token. |
<html>
  <body>
    <nylas-scheduler-editor />

    <script type="module">

      import { defineCustomElement } from "https://cdn.jsdelivr.net/npm/@nylas/web-elements@latest/dist/cdn/nylas-scheduler-editor/nylas-scheduler-editor.es.js";

      defineCustomElement();

      const schedulerEditor = document.querySelector("nylas-scheduler-editor");
      schedulerEditor.nylasSessionsConfig = {
        clientId: 'NYLAS_CLIENT_ID', // Replace with your Nylas client ID
        redirectUri: `${window.location.origin}/scheduler-editor`,
        domain: 'https://api.us.nylas.com/v3', // or 'https://api.eu.nylas.com/v3' for EU data center
        hosted: true,
        accessType: 'offline',
      }
    </script>
  </body>
</html>
import React from 'react';
import { NylasSchedulerEditor } from "@nylas/react";
function App() {
return (
<NylasSchedulerEditor
nylasSessionsConfig={{
clientId: "NYLAS_CLIENT_ID", // Replace with your Nylas client ID
redirectUri: `${window.location.origin}/scheduler-editor`,
domain: "https://api.us.nylas.com/v3", // or 'https://api.eu.nylas.com/v3' for EU data center
hosted: true,
accessType: 'offline'
}}
/>
);
}
export default App; ✨ If you're already using Nylas Hosted authentication in your application, or you want to use Custom auth, you can use nylasApiRequest to update the authentication settings in Scheduler.
Set up the Scheduling Component
The Scheduling Component requires either a sessionId (private configuration) or a configurationId (public configuration) to load the Scheduling Page with the associated configuration.
By default, the Scheduling Component renders all of its sub-components (mode="app"). If nothing is configured in the app mode, Scheduler follows the standard booking flow. See Using the Scheduling Component for more information about configuration modes.
<html>
  <body>
    <nylas-scheduling
      configurationId="<SCHEDULER_CONFIG_ID>" />
      <!-- OR set the scheduler session ID if using private configuration (`requires_session_auth=true`)-->
      <!-- sessionId="<SCHEDULER_SESSION_ID>"-->
    <script type="module">

      import { defineCustomElement } from "https://cdn.jsdelivr.net/npm/@nylas/web-elements@latest/dist/cdnnylas-scheduling/nylas-scheduling.es.js";

      defineCustomElement();
      ...
    </script>
  </body>
</html>
import React from 'react';
import { NylasSchedulerEditor } from "@nylas/react";
function App() {
return (
<NylasScheduling
// Set the scheduler configuration ID if using public configuration (`requires_session_auth=false`)
configurationId={"<SCHEDULER_CONFIG_ID>"}
// OR set the scheduler session ID if using private configuration (`requires_session_auth=true`)
// sessionId={"<SCHEDULER_SESSION_ID>"}
/>
);
}
export default App; Set up rescheduling and cancellation options
Booking confirmations and email notifications can include buttons that allow the participant to reschedule or cancel the booking. If they click one of the buttons, they're redirected to the corresponding page where they can make changes to their booking.
To set up the rescheduling and cancellation options, add the rescheduling and cancellation page URLs to the configuration and then create pages for each action.
Add rescheduling and cancellation page URLs to the configuration
You can add the URLs to the configuration either using the Scheduler API or modifying the Scheduler Editor Component.
Add the URLs to the configuration using the Scheduler API
To add the URLs, include scheduler.rescheduling_url and scheduler.cancelling_url in the PUT /v3/grants/<NYLAS_GRANT_ID>/scheduling/configurations/<SCHEDULER_CONFIG_ID> request.
When a booking is confirmed, Nylas automatically creates a booking reference and includes it in the rescheduling and cancellation URLs, replacing :booking_ref with the actual booking reference.
curl --request PUT \
  --url "https://api.us.nylas.com/v3/grants/<NYLAS_GRANT_ID>/scheduling/configurations/<SCHEDULER_CONFIG_ID>" \
  --header 'Accept: application/json, application/gzip' \
  --header 'Authorization: Bearer <NYLAS_API_KEY>' \
  --header 'Content-Type: application/json' \
  --data '{
    "scheduler": {
      "rescheduling_url": "https://www.example.com/reschdule/:booking_ref",
      "cancellation_url": "https://www.example.com/cancel/:booking_ref"
    }
  }'
{
"ID": "AAAA-BBBB-1111-2222",
"participants": [
{
"name": "Nylas",
"email": "nylas@example.com",
"is_organizer": true,
"availability": {
"calendar_ids": [
"primary"
]},
"booking": {
"calendar_id": "primary"
}}],
"availability": {
"duration_minutes": 30
},
"event_booking": {
"title": "My test event"
},
"scheduler": {
"rescheduling_url": "https://www.example.com/reschduling/:booking_ref",
"cancellation_url": "https://www.example.com/cancelling/:booking_ref"
}
} Add URLs to the configuration using the Scheduler Editor Component
To update the configuration in the Scheduler Editor Component, set the rescheduling_url and cancelling_url parameters.
<html>
  <body>
    <nylas-scheduler-editor />

    <!-- Configure the Nylas Scheduler Editor Component -->
    <script type="module">

      import { defineCustomElement } from "https://cdn.jsdelivr.net/npm/@nylas/web-elements@latest/dist/cdn/nylas-scheduler-editor/nylas-scheduler-editor.es.js";

      defineCustomElement();

      const schedulerEditor = document.querySelector('nylas-scheduler-editor');
      schedulerEditor.nylasSessionsConfig = {
        clientId: 'NYLAS_CLIENT_ID', // Replace with your Nylas client ID
        redirectUri: `${window.location.origin}/scheduler-editor`,
        domain: 'https://api.us.nylas.com/v3', // or 'https://api.eu.nylas.com/v3' for EU data center
        hosted: true,
        accessType: 'offline',
      }
      schedulerEditor.defaultSchedulerConfigState = {
        selectedConfiguration: {
          scheduler: { // The callback URLs to be set in email notifications
            rescheduling_url: `${window.location.origin}/reschedule/:booking_ref`, // The URL of the email notification includes the booking reference
            cancellation_url: `${window.location.origin}/cancel/:booking_ref`
          },
        },
      };
    </script>
  </body>
</html>
import React from 'react';
import { NylasSchedulerEditor } from "@nylas/react";
function App() {
return (
<NylasSchedulerEditor
nylasSessionsConfig={{
clientId: "<NYLAS_CLIENT_ID>", // Replace with your Nylas client ID
redirectUri: `${window.location.origin}/scheduler-editor`,
domain: "https://api.us.nylas.com/v3", // or 'https://api.eu.nylas.com/v3' for EU data center
hosted: true,
accessType: 'offline',
}}
defaultSchedulerConfigState={{
selectedConfiguration: {
scheduler: { // The callback URLs to be set in email notifications
rescheduling_url:`${window.location.origin}/reschedule/:booking_ref`, // The URL of the email notification includes the booking reference
cancellation_url:`${window.location.origin}/cancel/:booking_ref`
}
}
}}
/>
);
}
export default App; Create rescheduling and cancellation pages
After you add the rescheduling and cancellation page URLs, you must create the corresponding pages.
To create a page to reschedule an existing booking, create a new file and add the Scheduling Component with the rescheduleBookingRef property, setting it to the booking reference that you want to update.
To create a page to cancel an existing booking, create a new file and add the Scheduling Component with the cancelBookingRef property, setting it to the booking reference that you want to cancel.
🔍 You can find the booking reference in the rescheduling or cancellation page URLs, or in the notifications you get when you subscribe to Scheduler notification triggers.
<NylasScheduling
  rescheduleBookingRef="<BOOKING_REFERENCE>"
  // You also need to set the scheduler session ID if using private configuration (`requires_session_auth=true`)
  // sessionId={"<SCHEDULER_SESSION_ID>"}
/> <NylasScheduling
cancelBookingRef="<BOOKING_REFERENCE>"
// You also need to set the scheduler session ID if using private configuration (`requires_session_auth=true`)
// sessionId={"<SCHEDULER_SESSION_ID>"}
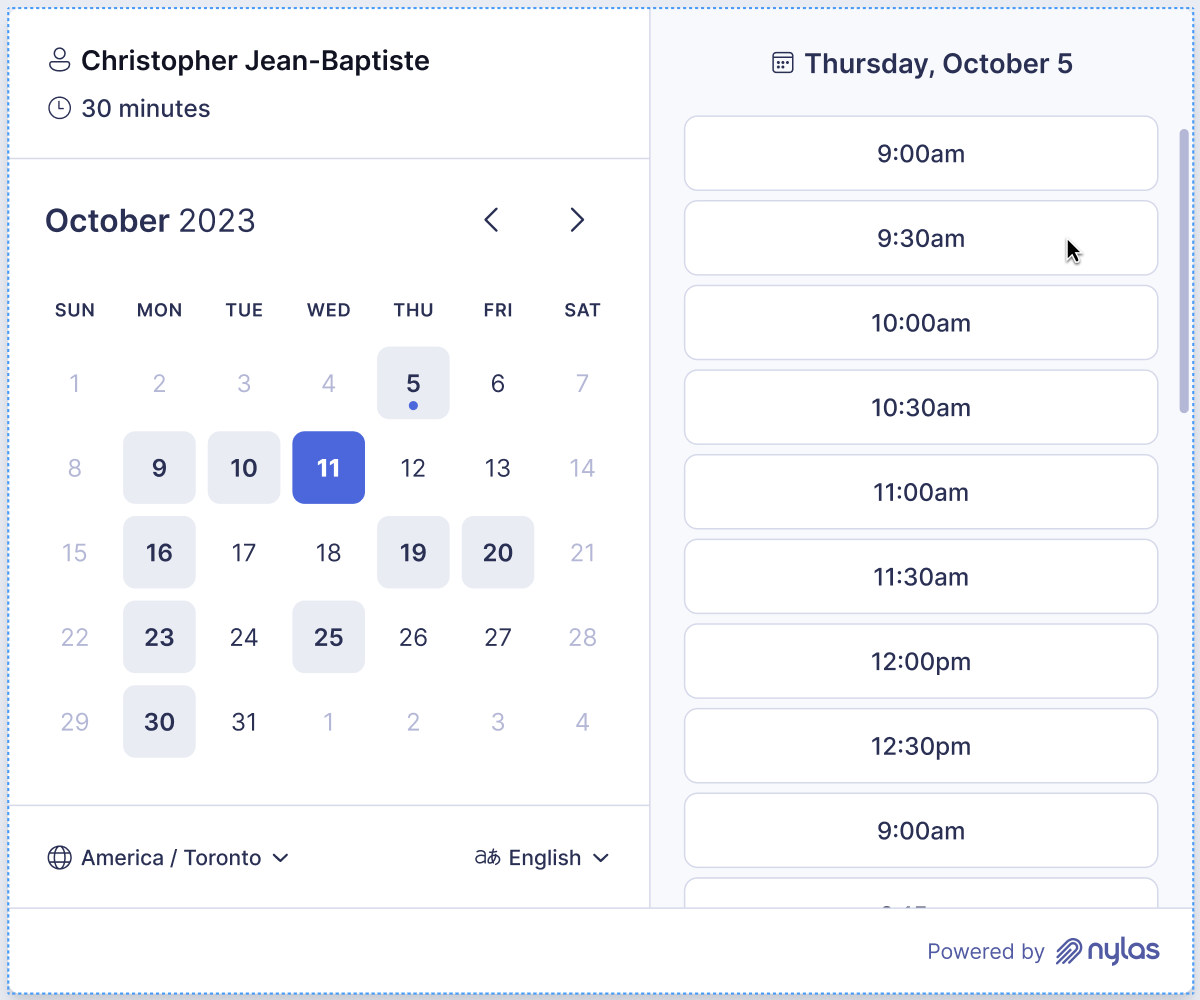
/> (Optional) Change your Scheduling Page name
By default, Scheduling Pages use the organizer's user name as the Page name, which Nylas displays in the top-left corner of the calendar view. To change the Page name, you can do either of the following:
- Set the
namefield when you make a Create Configuration request or an Update Configuration request. - In the Scheduler Editor, on the Page styles tab, set Page name.
(Optional) Style components using CSS shadow parts
The Scheduler UI Components support CSS shadow parts (::part()) for a higher level of UI customization. CSS shadow parts allow you to style certain parts of a web component without having to modify its internal structure or styles directly. For more information on available shadow parts, see the Scheduler UI Components reference documentation.
The following CSS sets the background and foreground colors for a component on the Scheduling Page.
/* Your stylesheet */
nylas-scheduling::part(ndp__date--selected) {
  background-color: #2563EB;
  color: #FFFFFF;
} 
(Optional) Disable confirmation emails
By default, Nylas sends a confirmation email to all attendees when a booking is created, rescheduled, or cancelled. To disable confirmation emails, set disable_emails to true in the configuration.
What's next?
Now that you're set up with the Nylas Scheduler, check out the following documentation for more information: